Home / Robots / ASTRO / Buy / Build
You are viewing ASTRO v1.0
Build ASTRO
Assemble and wire your ASTRO from the ground up with step-by-step guides every part of the way.
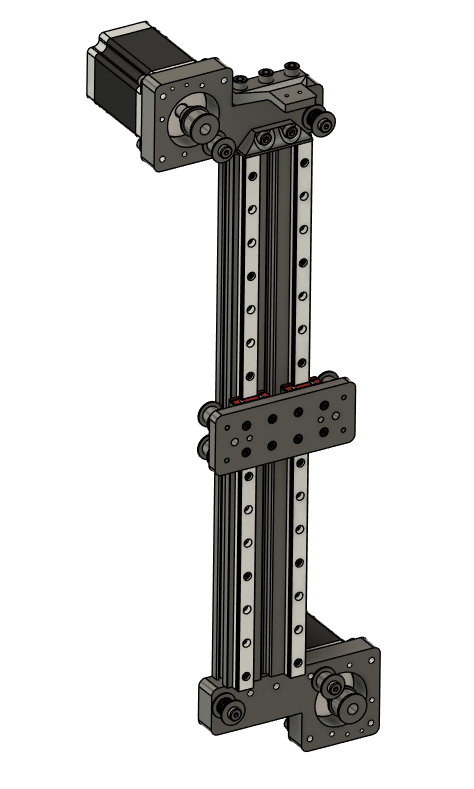
Start Of Vertical J2 Assembly
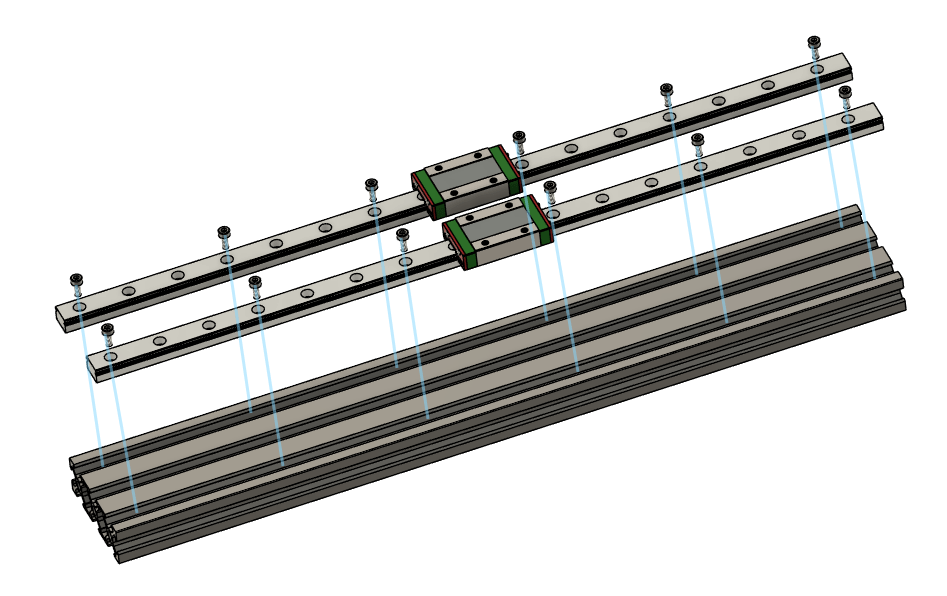
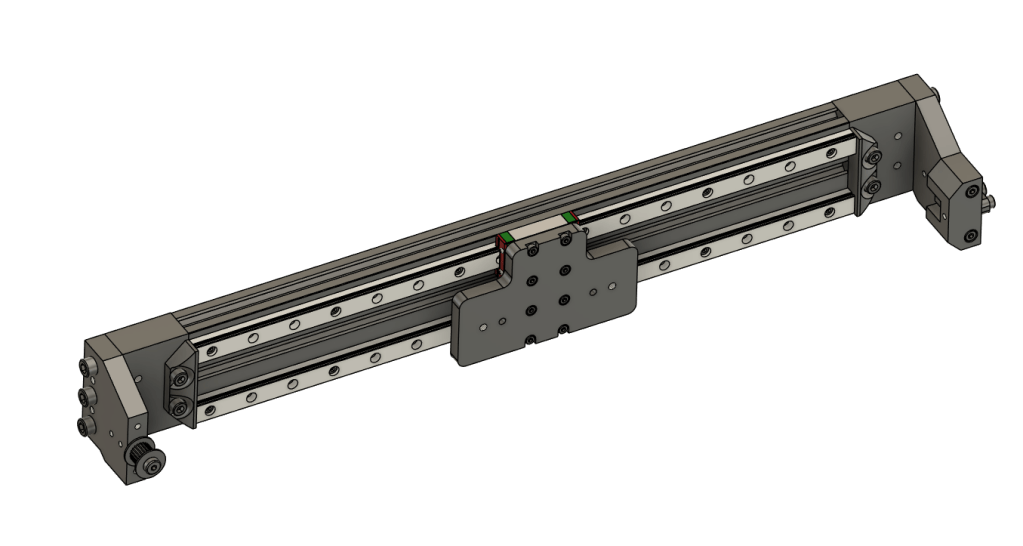
J2 Step 1: Assemble Linear Rails
Add 2 Linear rails to one of the 2060 extrusions use m3x8mm socket heads with the drop in t-nuts, place 1 bolt every 4 holes (not really necessary to do all of them)
Create 2 of these, we’ll need 1 for the vertical and 1 for the horizontal
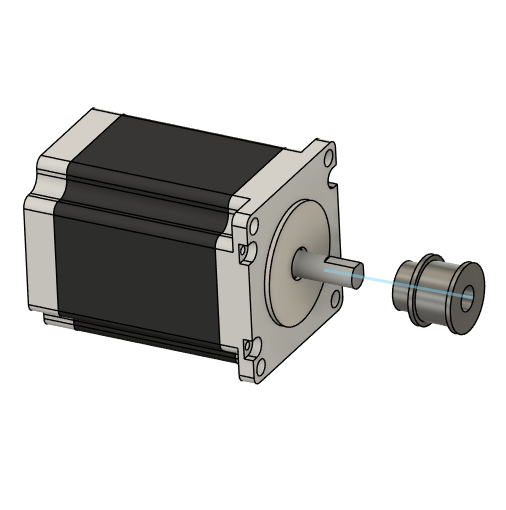
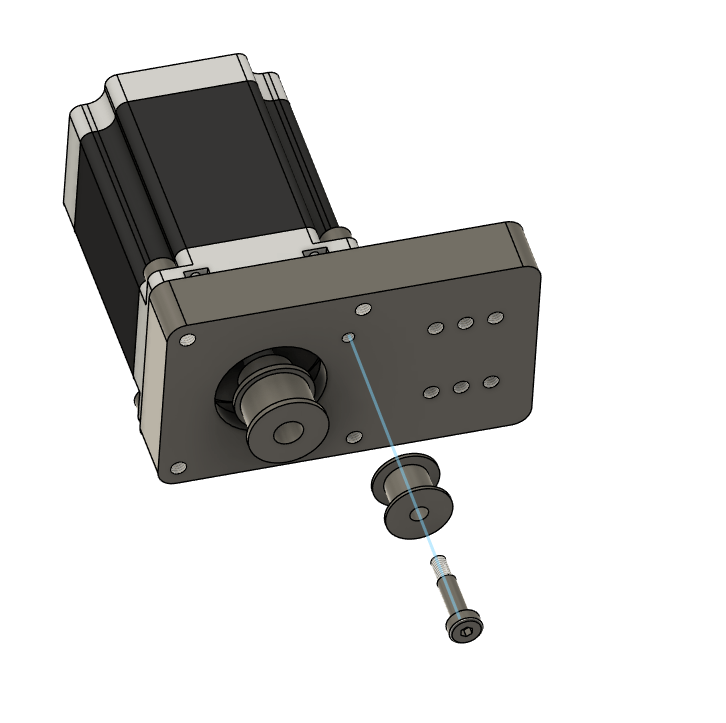
J2 Step 2: Add pulley to motors 3x
Grab all 3 of the Nema 23 motors and add the 30 tooth gt2 pulley and put it on the shaft so that the pulley is left with a 10mm gap, be sure to line up the flats of the motors with the setscrew on the pulley
Create 3x Assemblies
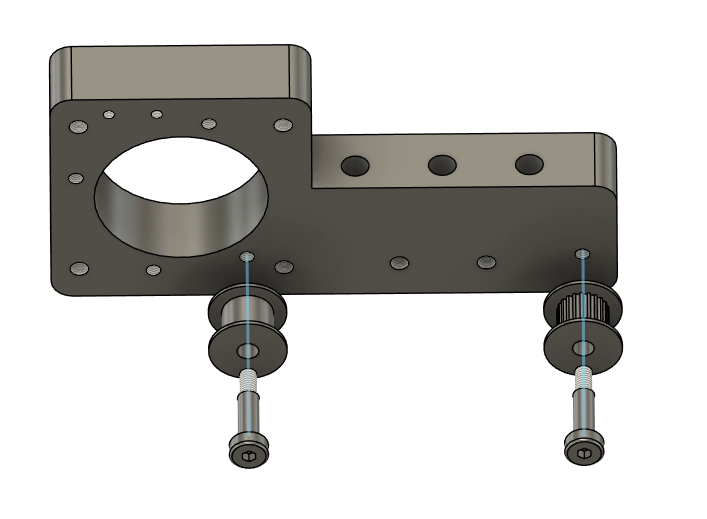
J2 Step 3: Prepare the motor plates with idler pulleys 2x
Attach the SMOOTH idlers on the front side of both of the motor plates closest to the motor using the m4 shoulder bolts
Attach the TOOTHED idlers on the far side of both of the motor plates with the m4 shoulder bolts
Create 2x Assemblies
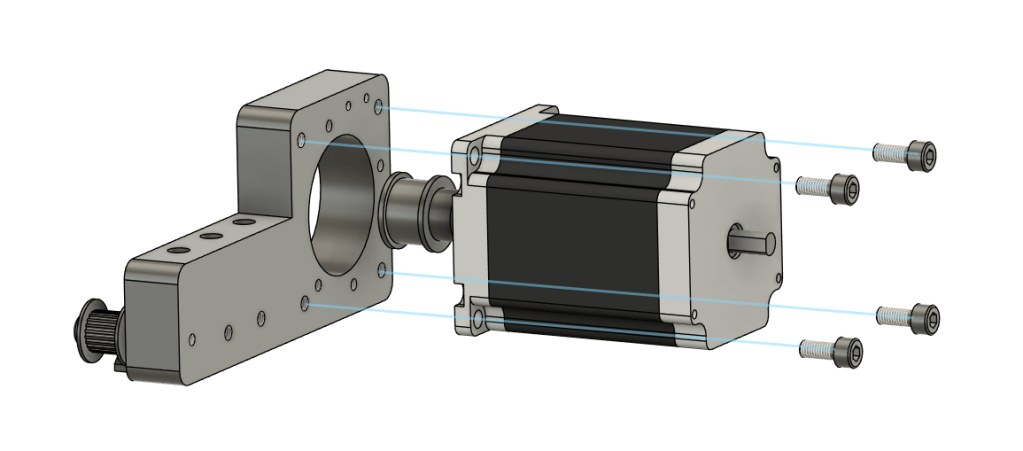
J2 Step 4: Add motors to motor plates 2x
Grab both of the J2 Motor plates and using 4x m5x12mm bolts attach the motor to the back side of the motor plates, have wires of the motors face the direction of the motor plate mounting surface
Create 2x Assemblies
J2 Step 5: Add one axis bumper
Take one of the motor assemblies and one of the axis end stops and using m5x12 bolts mount it to the top motor assembly
Only add the stop to one (1) of the motor assemblies. Set the other finshed motor assembly to the side.
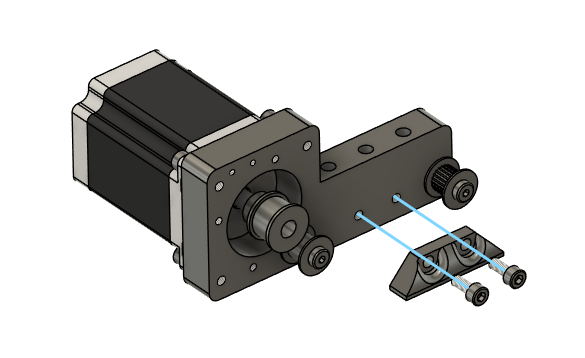
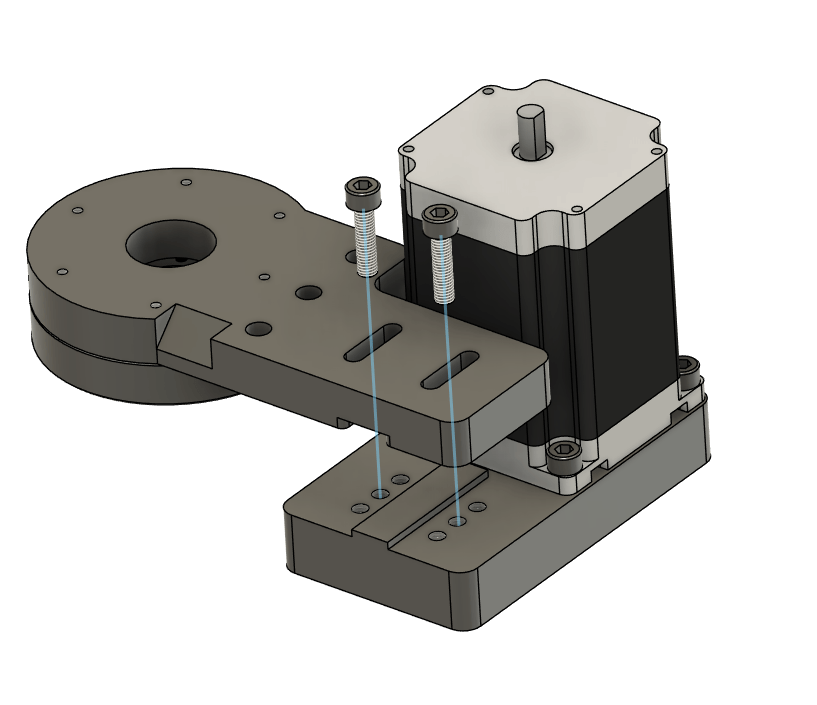
J2 Step 6: Attach Upper Motor Assembly
Take the same motor assembly, the Cable carrier bracket, and the assembled vertical rail assembly and bolt the motor assembly using 3x m6x60 bolts to the vertical rail assembly
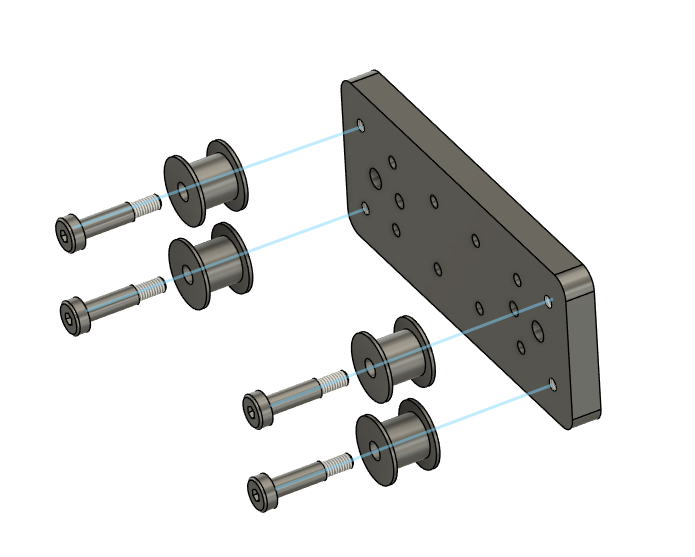
J2 Step 7: Prepare the rail mounting
Take the J2 Rail Mount plate and add 4x SMOOTH idler pulleys to the back side of the plate using 4 m4 shoulder bolts
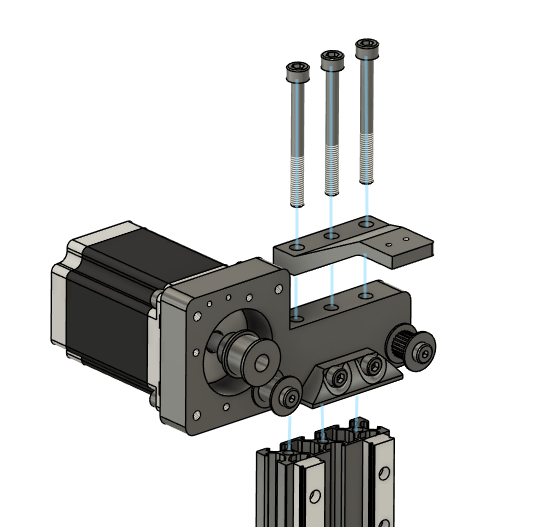
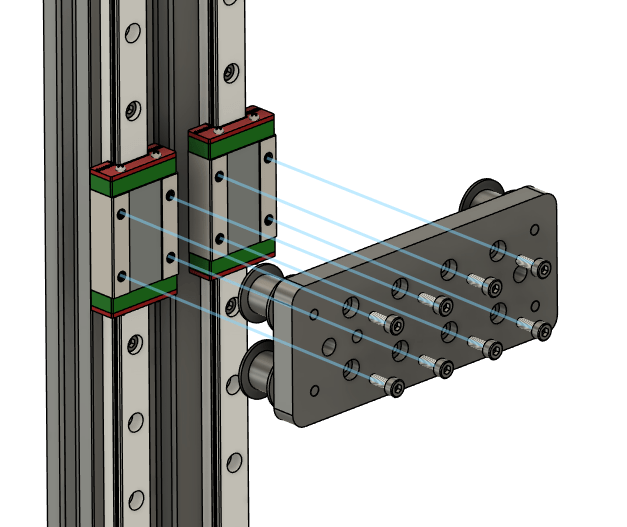
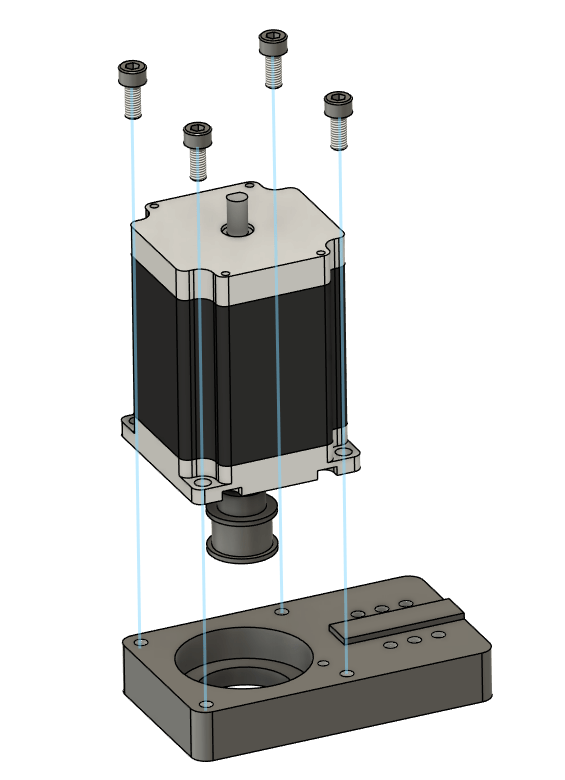
J2 Step 8: Connect Vertical mount plate to rails
Take the assembled J2 Mounting Assembly and using 8x m3×8 socket head bolts mount the assembly to the rail carriages
Start Of Rotary J1 Assembly
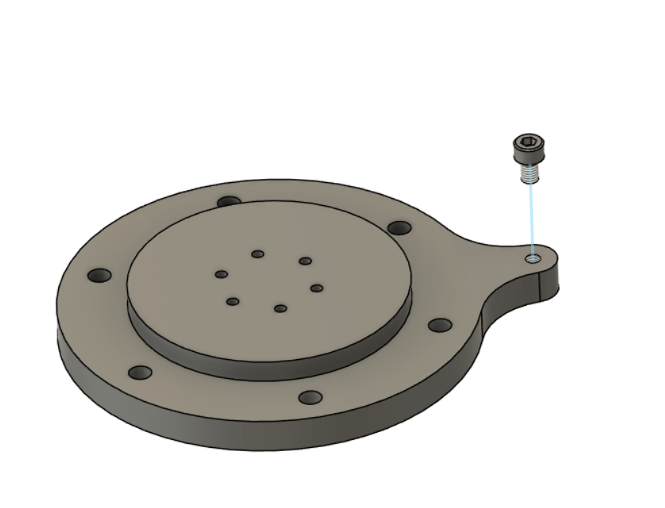
J1 Step 1: Add J1 Sensor Bolt
Take the Flange base Mount and add 1x M5x8 Socket Head bolts
J1 Step 2: Attach J1 Bearing
Take the RU42 bearing and 6x M3x16 socket head bolts and mount the RU42 bearing to the J1 Bearing to Vertical Plate
J1 Step 3: Assemble J1 Motor Plate
Take the last Nema 23 Motor and attach it to the J1 Motor Mount Plate using 4x M5x12 socket head bolts
J1 Step 4: Add Idler to J1 Motor Plate
Grab a SMOOTH idler and attach it to the J1 Motor Mount Plate using a M4 shoulder bolt
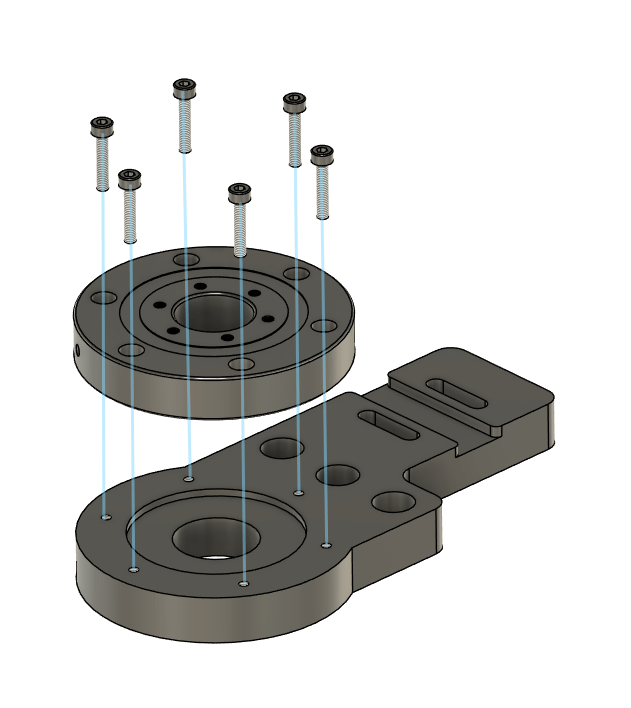
J1 Step 5: Combine Motor to bearing Plate
Take the J1 Motor Assembly and the J1 Bearing Plate and bolt them together using 2x M5x20 socket head bolts
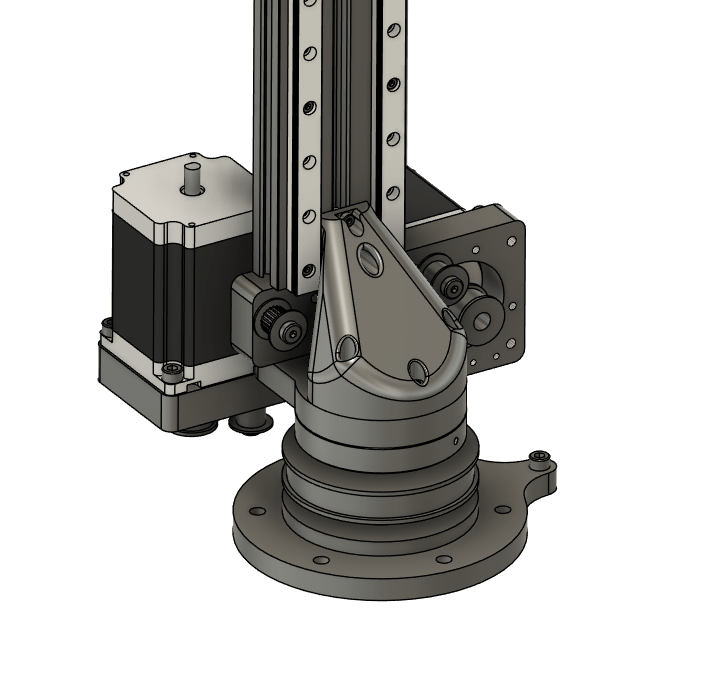
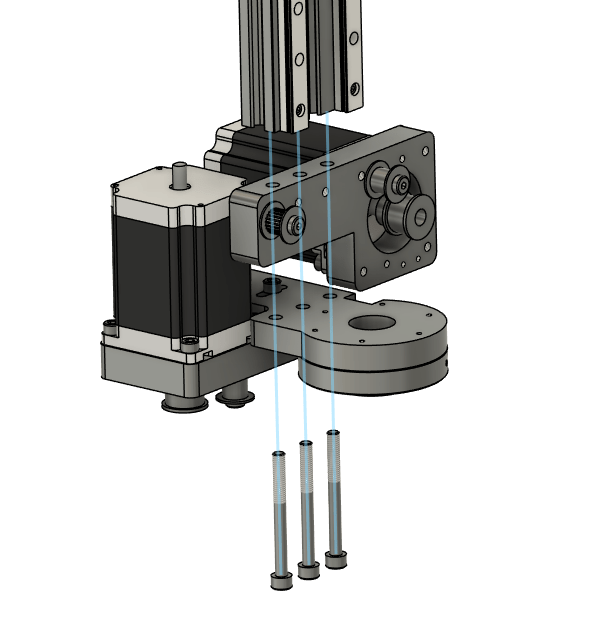
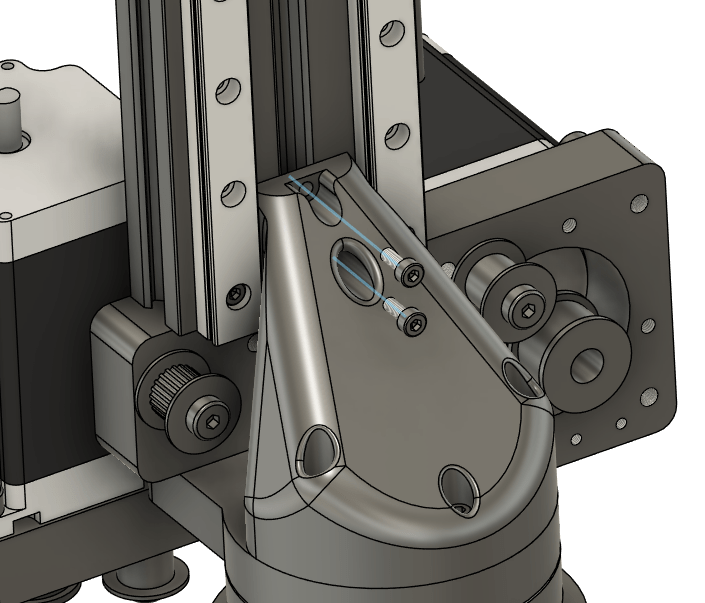
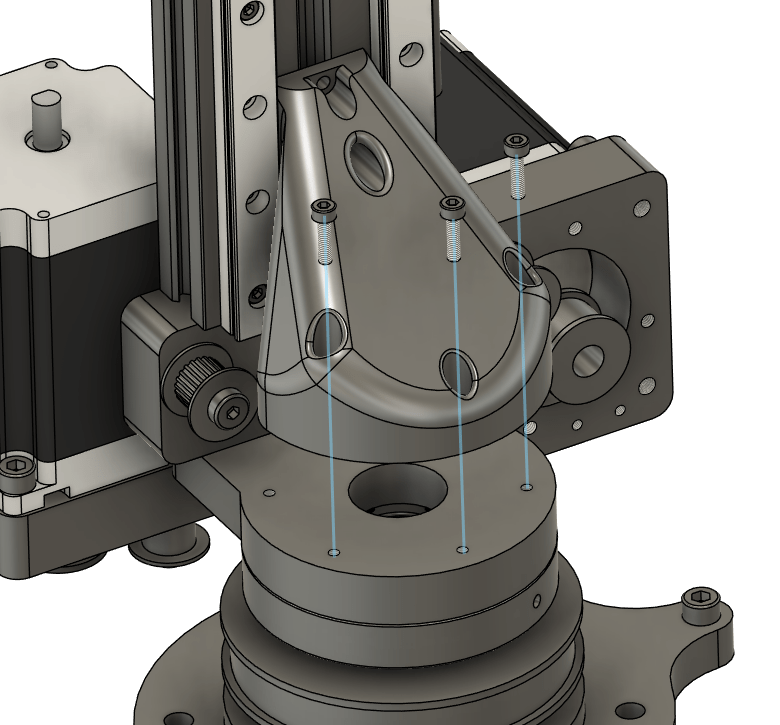
J1 Step 6: Connect J1 Assembly to J2 Vertical Assembly
Using 3x M6x60 socket head bolts, sandwich the J2 Motor Assembly between the J1 and J2 Vertical assemblies and fasten to secure.
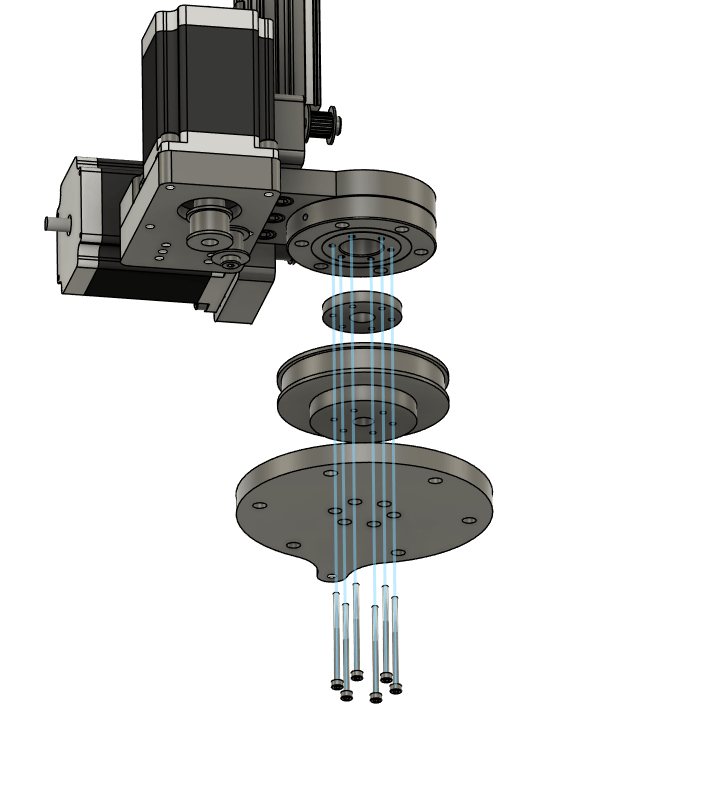
J1 Step 7: Flange Base to Bearing
Using 6x M3x50 socket head bolts, sandwich the J1 pulley spacer, GT2 120tooth pulley, and the J1 Flange Base Mount and fasten to secure.
J1 Step 8: Add J1 to J2 Stalizer Part 1
Take 2x Drop In M3 T-nuts and add them to the J2 Vertical Linear Rail
Take 2x M3x8 socket heads, loosely attach the J1 to J2 Brace to the J2 Vertical Rail.
J1 Step 9: Add J1 to J2 Stalizer Part 2
Take 3x M3x12 socket heads and fasten the Brace down into the J1 Plate
Finish tightening the brace to the J2 Vertical Rail from the last step.
J1 Step 10: Add Belt
Take the 350mm 10mm width GT2 Closed loop belt and slip it over the J1 Flange Base Mount, then tension it by sliding the J1 motor plate and tightening it down
Start Of Horizontal J3 Assembly
Step 1: Add pulley to motors
Grab all 3 of the Nema 23 motors and add the 30 tooth gt2 pulley and put it on the shaft so that the pulley is left with a 10mm gap, be sure to line up the flats of the motors with the setscrew on the pulley
Create 3x Assemblies
